Back in Oct of 2015, I bought a very VERY CHEAP 3D Printer (and blogged about it here). I have now come to understand just how cheap it really was.
Right at 1,000¥ (~$160), it was arguably the cheapest 3D Printer on the market. But because it was so cheap, it had a lot of problems:
- Wires always breaking off
- Constant Print Bed Leveling issues
- Constant Print Head Clogging
- Too sticky, or non-sticking prints to the bed (bed was not heated)
- Origin Print Stop Switch moving and needing to be glued in place
- Poor quality prints
- Mainboard fried and had to be replaced
- No power switch (minor)
- Wobbly print bed
- Printed in the wrong direction so printouts were mirrored (text/objects reversed)
It was primarily made out of acrylic and easy to break. I know this for a fact as one night after babysitting it for 8 hours, the print head decided to clog at 5am and ruin what was to be a nice print. So I threw a fit and busted the print bed into three pieces. It was cathartic indeed. Later I glued it back together, but not before resolving to do more homework and find a better printer!
I called the vendor about a lot of these issues, but they were basically worthless: HCC Convenient 3D Printer – Avoid it at all costs!!!
I did finally resolve the mirrored printouts issue by re-burning the Mainboard ROM with modified code to take into account the print head moved backward on the X-Axis from every other 3d printer on the market.
Everything else still just sucked.
So here are some of the things I learned to avoid and what to resolve in a new 3D Printer:
- Don’t buy a 3D printer with a print bed that moves up and down – unless you want to pay out the nose for one.
These printers have their print beds anchored on only one side, leaving the other end to wave in the breeze. Unless it really well anchored and aligned, it will do just that: wave in the breeze. A variation of as little as .1mm up or down on the far side of the print bed will result in a poor or failed print. The print won’t adhere to the bed on that end, or as the print gets taller, the bed variations are amplified and the top of your print looks like crap because the base bounced all over the place during a print. - Don’t by a printer with the frame/size made of plastic.
This stuff is cheap, lightweight, bendy and brittle. It will bend, bounce, and break all at the wrong moments. Sure, you have a lightweight printer that’s easy to move around, but while its printing, move around it will (on its own!). Otherwise you have to glue, screw or tie in down – then what’s the point of lightweightyness? - It must have a cooling fan on the Extruder – not just the Hot-End.
The extruder gets hot: 210c for PLA, hotter for ABS. This heat travels up the hot-end and eventually into the extruder gears. There the PLA gets soft and can no longer be pushed by the print head motor resulting in clogs. And let me tell you: Unclogging a print head is a major PITA! - Don’t Print in ABS
A lot of people like to print in ABS. It produces a nicer looking print and is a softer more forgiving plastic. But studies have shown that printing in ABS gives off carcinogenic fumes and 10x more PM2.5 particles than PLA. While PLA is basically benign. Don’t take my word for it. Google it. ABS is just nasty. Plus you need a hotter print head and print bed – which you can easily burn yourself on. Which brings me to the 5th point. - Get a heated print bed.
A lot of vendors will tell you a heated print bead is not required for PLA – because those vendors probably don’t sell them. You need a heated print bed. Even with the best bed tape (Scotch Blue), without a heated print bed, the print will most of the time curl up around the edges. That’s not good. I’ve had prints come off mid-print because it just wouldn’t stick. - Make sure the clearance between the Print Head and Bed can be finely adjusted.
Adjustment screws and the four corners are the common method for bed adjustment. Some of the fancier (read: much more expensive printers) can auto-level the bed. But most of the time, this is just a lie. They don’t automatically level the bed, they just print a raft under your object to make up for the unlevel bed. Rafts make for ugly finishes on the base.
As I have found: The difference between a good sticking print to the bed and a failed print is as little as .05mm clearance difference. I bought a set of Feeler Gauges just for the purpose of leveling my bed – and its so much better and more accurate than a sheet, or two, of copy paper. - Get a Printer with a REAL Power Supply.
The “Convenient 3D” printer had a power brick. Those have barely enough power to get the print head hot. It’s not going to be enough to get the print bed hot too – and keep it hot. - Get a Printer with a Control Panel and a SD Card slot
Most printer come with this already, but be carefully as many do not. Without these features, you must run your prints directly from your PC over USB cable. This rarely works. If you PC’s screensaver kicks in, the printout stops and fails. If you cable it not perfect or a little too long, the connection is dropped for microsecond and the printout stops and fails. If you do ANYTHING on your PC that interrupts the stream of data to the 3d Printer, the printout stops and fails. Basically your PC becomes a dedicate brick to the printer while printing. And since print can last multiple hours, or days, your PC is useless for anything else. - The Print Bed MUST be removable
There will be times that the object printed will be stuck to the bed so completely that you cannot pry it off! Rather than damage your printer, get one with a removable bed so you can work with it safely. I’ve had to put mine in the freezer or hit the object off with a hammer once or twice to get it freed. You just can’t do this safely with it still attached to the printer. - If you go the Kit route, be patient and ask for help
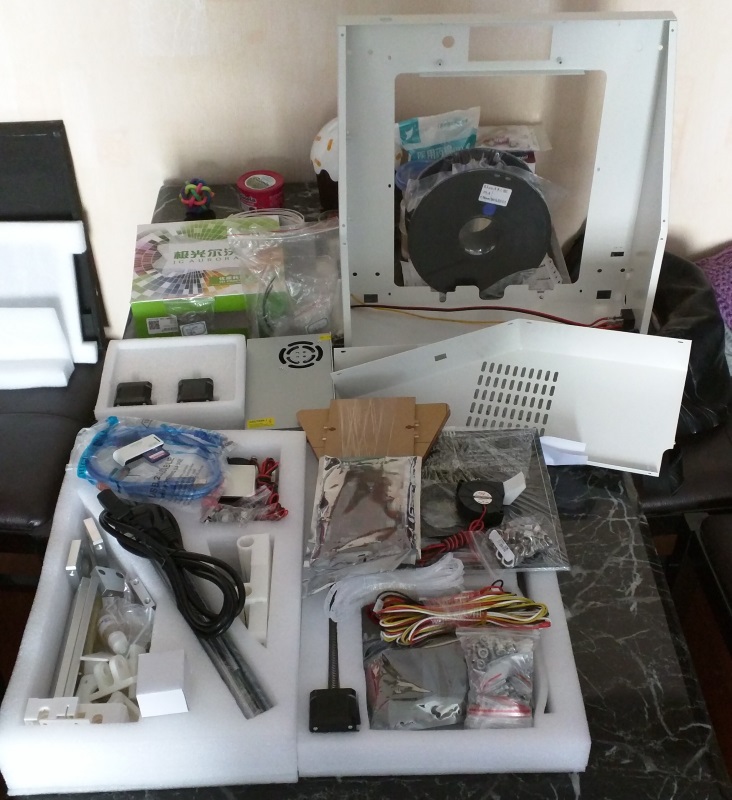
Both my new and old printers where kits. And the instructions were in Chinese. BUT, they both had video walk-thru’s that really helped. The first printer, Convenient 3D, the video sucked but where still useful. The second one was very professionally made and clear and easy to follow. It took me 5 days (30 hours) to put the first printer together, but only 12 hours for the second one.
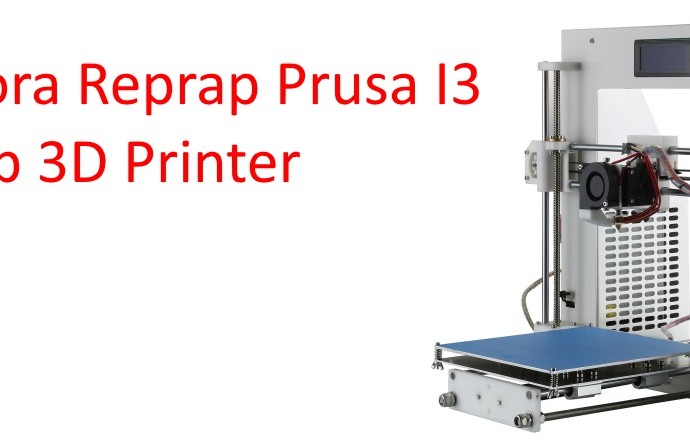
So keeping all these things in mind, I went hunting for a better printer. Amazingly, what I found was an excellent 3D Printer for only 1400¥ more (~$220): JG Aurora A3 Prusa I3 Reprap printer priced at just 2400¥ (200¥ more if I wanted it pre-assembled).
Buying it was another problem. It was like Monty Python’s Cheese Shop skit, vendor after vendor: “Yes, we have it in stock. Yes we can ship it immediately”. Two days later: “No, sorry we don’t actually have that printer and don’t know when we’ll get it in again”
Finally, I found the manufacture’s sale web site, but again it was the same song and dance. I asked them specifically when I was about to order it if they did indeed have it in stock and ready to ship: “Yes, of course! We are the manufacturer. We have hundreds in stock”. Ok, then. I ordered it. A few hours later a message came back: “We are missing a critical part and won’t have it in until Monday (3 days), sorry”. So I told them I would give them a bad rating on Taobao and cancel my order unless they threw in a 130¥ spool of PLA Filament for free and ship it all Monday. They readily agreed and I got my printer, and free filament, 5 days later!
Yeah, it’s a Kit. That’s why I’m Insane!
When I got it (aside from the fear of assembly), I was wonderfully surprised by how much better this printer was for only 1400¥ more:
- All steel powder coated frame: heavy, strong, durable
- Majority of cast aluminum parts
- Hefty Power Supply
- Aluminum removable heated bed with aluminum sub-frame
- Large, high-quality mainboard
- Packaged and padded very well
- Professionally done instructional videos: no words just step-by-step assembly demonstrations
- Big, hefty motors and clearly marked wires
- Lots of extra nuts, bolts, etc in case you loose some
- Extras of plastic printed parts in case any break + model files so you can reprint them
Twelve hours later I had it assembled (yes, I spend all day from noon to midnight). The next day, I was printing with it.
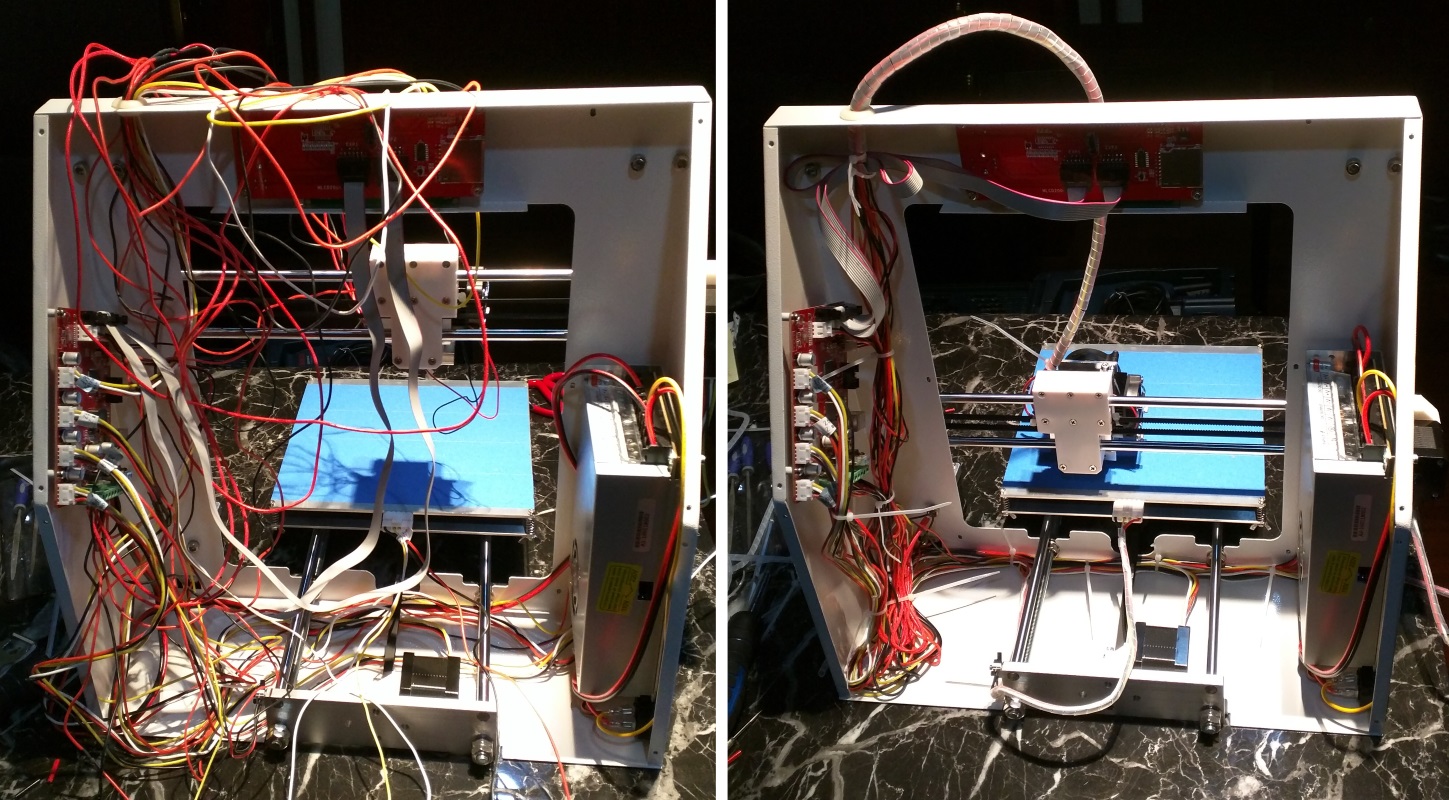
On Left: All Wired Up in a Complete Mess!
On Right: Some primitive cable maintenance
OMG! OMG!! Oh.My.God! Where these prints SOOOOO MUCH BETTER!!

On Left: Awesome Aurora A3 Print.
On Right: Crappy Convenient 3D Print.
- The Print Bed moves front to back (Y-Axis) on two steel rods (instead of up and down), so there is no wobble, no waving, no inaccuracies.
- The Print Head moves side to size (X-Axis) on two steel rods as well. Also very accurate and tight.
- The Print Head also moves up and down (Z-Axis), also on two steel rods, BUT with TWO motors (one at each end) so both sides are always at the same height and always in sync.
Make no mistake. With all these motors (5 in all), and three fans, all metal frame and rails, its not quiet. But it does ‘sing’ when its printing. It’s loud! It’s badass! Its awesome!!
Here’s a slide-show of some of the wonderful things this printer can print (that the old crappy one could NEVER do):
[slideshow_deploy id=’1190′]
Along with printing out a plethora of things from thingiverse, I’ve also reacquainted myself with Sketchup and designed a few things as well. Nothing really earth-shattering by themselves, but useful none-the-less.
There are some Must Have accessories for you 3D Printer and a couple of Niceties:
- Feeler Gauges: Must Have. You only need a few, but they usually come in large sets. Typically, the printer specs state a gap of .2mm between the print bed and head. But your printer may be different. Get a set of gauges that include this size along with a couple thinner and thicker than this in .02 – .03mm increments. I find that a gap of .23mm works best for my printer in holding the prints without making them impossible to remove.
- Calipers: Nicety. If you’re designing things or copying things, a good set of calipers accurate to .05mm is a must. Printer accuracy runs from .05 to .4 mm, so if you are designing low tolerance items, you must have good calipers.
- Scotch Blue Tape: Must Have. Heated bed or no heated bed, you need Blue Tape: Scotch Blue Original Multi-Use Painter’s Tape. Nothing I have found sticks better to the print bed without pulling up and sticks to the print object strong enough to keep it from curling while still allowing it to be relatively easy to remove.
- Tweezers: Must Have. Filament can ooze out the print head at the beginning of a print. If you’re wanting a ‘perfect’ print, this excess can ruin it. Sometimes I will grab the excess off the nozzle as it starts to print to keep it from being dragged around the bed and messing up the object.
- Mini Metal Files: Must Have. You’re not always going to get nice smooth prints. Sometimes you’ll have supports that need to be removed and these leave rough bumps behind. I set of good quality metal files of varying profiles is a must for cleaning things up.
- Sandpaper: Nicety. I’ve not used any sandpaper, mainly because its hard to find here. But it can be used to smooth out the surface of a print for a good finished look.
- Spool Hub: Must Have. Filament Spools have a 50-60mm center hole and most spool holders use an 8mm axle. The result is the spool is difficult to turn as the extruder pulls more filament. This can cause mis-feed of filament and gaps in your prints. Getting a Spool Hub (you can print ones out from ThingiVerse that match your spool and provide an 8mm hole makes the spool rotate much more easily.
- Super Glue: Must Have. Nothing works better for gluing PLA together. A lot of prints come in multiple parts (to reduce the need for supports) and must be glued together.
- Large Zip-Lock Freezer Bags: Must Have. Not sure what the sizes are, but you’ll want to pick up some large zip-lock freezer bags to put your spools of PLA in. And KEEP the Desiccant that come with it. PLA is hygroscopic (it can absorbe water) with can ruin it. So any unused filament (from changing colors to just storage) should be kept in an air-tight zip-log bags with the desiccant to keep it dry and happy.
- Rubbing Alcohol: Nicety. If you are careful, you can print on the same blue tape many times before needing to change it. You’ll know its time to change when your prints stop sticking to be bed. First check your clearances between the print head and the bed. If they are OK and you wish to extend the life of the tape a little, take a cotton ball with a small amount of rubbing alcohol in it and clean the tape. Then let it dry completely before printing again. Your prints will then start sticking again. They may even stick too well! So clean sparingly and you’ll get more use out of the tape before replacing it.
- Canola Oil: Must Have. Yes, that’s right: Canola Oil. Print Heads will clog, even on the best printers. PLA melts and cools and melts and cools every time you do a print. Deposits will form in the head and build up, much like atherosclerosis, until it blocks the nozzle. From what I’ve read and what I’ve experienced, Canola oil acts like Crestor for you printer – cleaning out those build-ups and lubricating the chamber. This doesn’t totally eliminate clogs, but they will happen much less often. And cleaning a print nozzle is a major PITA.
USER SPARINGLY: I put a little drop or two on a Q-Tip and run it up and down the filament before every major print and when I change spools. You know you’re using too much if the nozzle starts getting brown spots on it: that’s the excess Canola Oil leaking out. It can fall off and onto your print and make ugly spots.
What Slicer Software to Use? In 3D Printing, the Slicer takes your 3D Object and converts it into instructions called ‘g-code’ to be sent to the printed. It’s called Slicing because it does this in Slices, layer by layer. I currently use Cura as it appears to be the best/free Slicer available at this time. I’m testing CraftWare as it promises to be the best/free Slicer once its out of Beta (right now it’s still pretty buggy). In all reviews I’ve read, Simplify3D is the hands-down best slicer available at the moment, but its price tag it too high for my pocketbook (it’s half the price of my printer!)
If you are wanting to design things, I’ve found Sketchup to be the easiest tool to use (and it’s free!). Plus it can export to .stl files (used by all the Slicing software for 3D Printers) I’m not an organic person and can’t design organic things. I hear Blender is a great tool (and also free) for organic modelers.
Personally, I think being a IT guy (software/computer programmer) and 3D printing go hand-in-hand. I love programming because of the precision: Writing something to do run exactly the same, over and over again. There’s no ‘close-enough’, or left-over code. No fudging or estimating. It either works or it doesn’t. (I could never be an artist/painter/modeler. I just can’t do ‘organic’ – it has to be exact). With 3D Printing, I design something in a 3D tool and print it out, over and over again, and its always exactly the same – exactly as I ‘programmed’ it. I’ve always like to build things, but always got frustrated when cuts weren’t straight, or measurements were off, wood warped, stuff shifted. But with 3D Printing, what you set/measure/draw it (almost) exactly what you get (we’re talking differences of .02mm or so). Like a Software Developer, 3D designing and printing also requires you to accept a lot of failures. It will only do what you tell it, within its capabilities, which is not always what you are actually wanting.
But it is cathartic – without having to smash something…
So, I hear you asking: What did you do with the old In-Convenient 3D Printer?
I SMASHED IT!!! (Just Kidding)
The Wife suggested giving it to somebody. I told her I wouldn’t give it to my worst enemy!
Instead, I completely disassembled it and saved all the good parts: motors, gears, pulleys, nuts, washers, bolts, rods, mainboard, wires, etc. and threw out the crappy frame and all the other plastic parts. Not sure what I’ll do with it all, but I’m sure someday they’ll come in handy (usually right after I decide to throw them out).