
3D Printers. They’re everywhere. They’re expensive. They’re cantankerous. They’re smelly. And I WANT ONE!
So I bought one. Cheapest I could find. A DIY kit in China for ¥1,000 ($158). I think it was the cheapest printer anywhere.
When I received the very heavy box and opened it up, I thought “OMG what have I done!?”
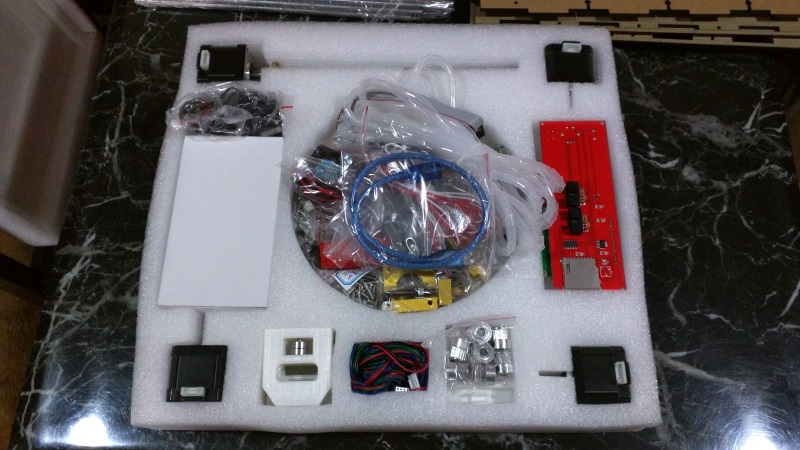

It’s a black acrylic box about 32cm on a side. There were about 200 screws, nuts, and washers along with wires, motors, rods, switches, a motherboard, power supply and LED control panel, etc.
I had also ordered 250g of Red PLA filament. That was missing. It came two days later after the seller apologized for forgetting to send it.
The instructions were supposed to be in English, but there were none at all.
We jump on the phone to the seller (and online chat), who tells us we need to download the instructions from the BaiDu files sharing site. He gives us the URL. There are four folders totaling over 3GB of data (mostly videos), PDF files, photos and software. You have to have a BaiDu account to download all this, luckily my wife had one and didn’t realize it. Downloading takes almost 2 hours. It would have gone much fast if I’d let BaiDu install spyware/crapware on my PC to accelerate the downloading.
The videos had no sound and no order assigned to play them in. The instructions were in Chinese and very broken English.
Frustrated, but undeterred, I read all the instructions and viewed all the videos and went to work. The sellers web site said it was ‘intuitive’ to assemble would take 3-5 hours to do so.
It took me 5 days. And the issues were many:
- No instructions on how to mount the front LED panel. Turns out there were 8 plastic washers/standoffs to use to mount with.
- No indications which length of bolt to use on each piece. Eight (8) different bolt lengths, all with the same threading.
- No direction on which side was up for the bottom. I installed the bottom upside down and didn’t discovered that until almost complete.
- The print platform came in two pieces. The instructions showed only one piece
- No information on how to level the print platform. I used nuts and washes only to discover after it was completed that 4 of the five springs could be used to adjust and level the main platform it against its supporting platform.
- The instructions talked about models with an SD Card slot (shown in the front panel) and those without. It’s not until after I tried (and failed) printing a test model over USB that I discovered the SD card slot on the side of the front LED panel.
- The wire cable provided for the Z Motor (vertical) has its connector wired wrong and so the stepper motor would not work. I had to rewire it after talking with the seller.
- The Allen Head bolts on half of those parts were threaded in backwards, so I had to unscrew the tiny little bolts with my hulking fingers, turn them around and screw them in the right way.
- The instructions show using blue painters tape on the printing platform to help the PLA stick, but the kit didn’t provide any.
- The holes in the bottom to thread the wires and cables through are just a bit too small.
- There appears to be no way to turn the printer off, short of unplugging it.
- All the metal rods where just a tiny bit too long, which caused rubbing or warping against the acrylic box and made it hard for the motors to turn them. So I spend a few hours filing each one down the the proper length.
- The Limit Switch cables have the wrong connects on the ends for plugging into the motherboard. So you just have to force it in.

Front View – Completed!

Underneath – Wiring Disaster
Surprisingly, with all these issues, the printer actually works!!!
After a couple of misfires and problems with the PLA filament sticking to the bed, I got a fairly decent model printed.

A misfire. The piece came off the print bed while printing

A Finished Robot!!
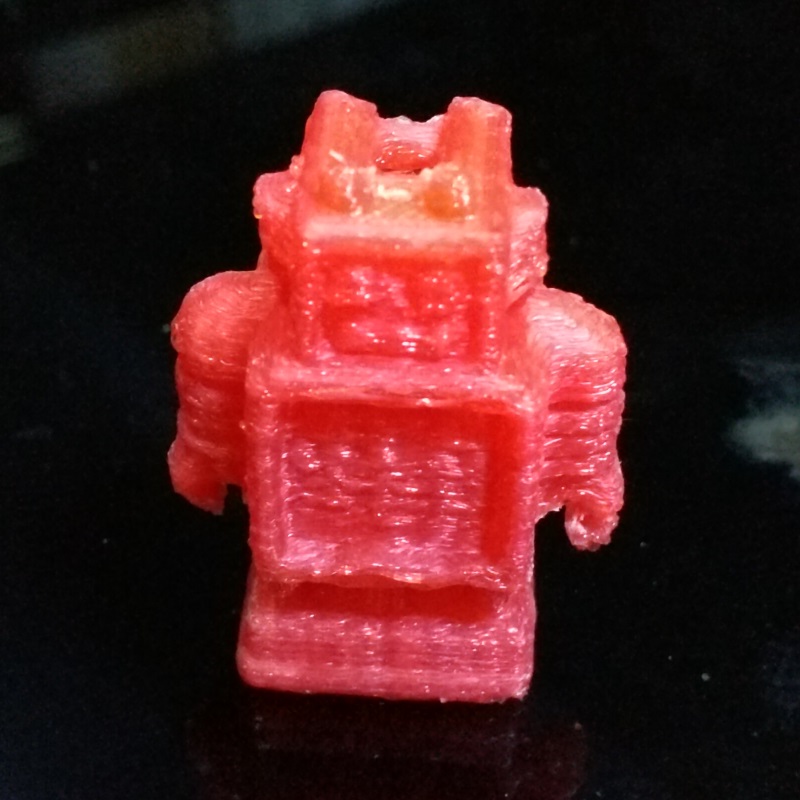
Up close after being cleaned up a bit. It’s only 2″ tall…
One of the issues is getting the bed to within .4mm of the print head. I Googled and found that 4 sheets of copy paper is about .4mm. So I used that to test and adjust tolerances.
Here’s a shot clip of it in action. The printer vibrates a lot! And it kept trying to walk off the table. So I got some rubber feet and stuck it to the bottom.
It can print is high-res mode, sort of. But the models don’t really come out any different than Regular print mode, and it takes twice as long.
All in all, even with all the issues and language differences, its a bargain first 3D Printer at ¥1,000 ($158). This will give me good practice and knowledge for when I got out and buy a REAL 3D Printer!